This article explains how to create projects and tasks in Time Doctor as well as how to add employees to a project.
How to Create a Project
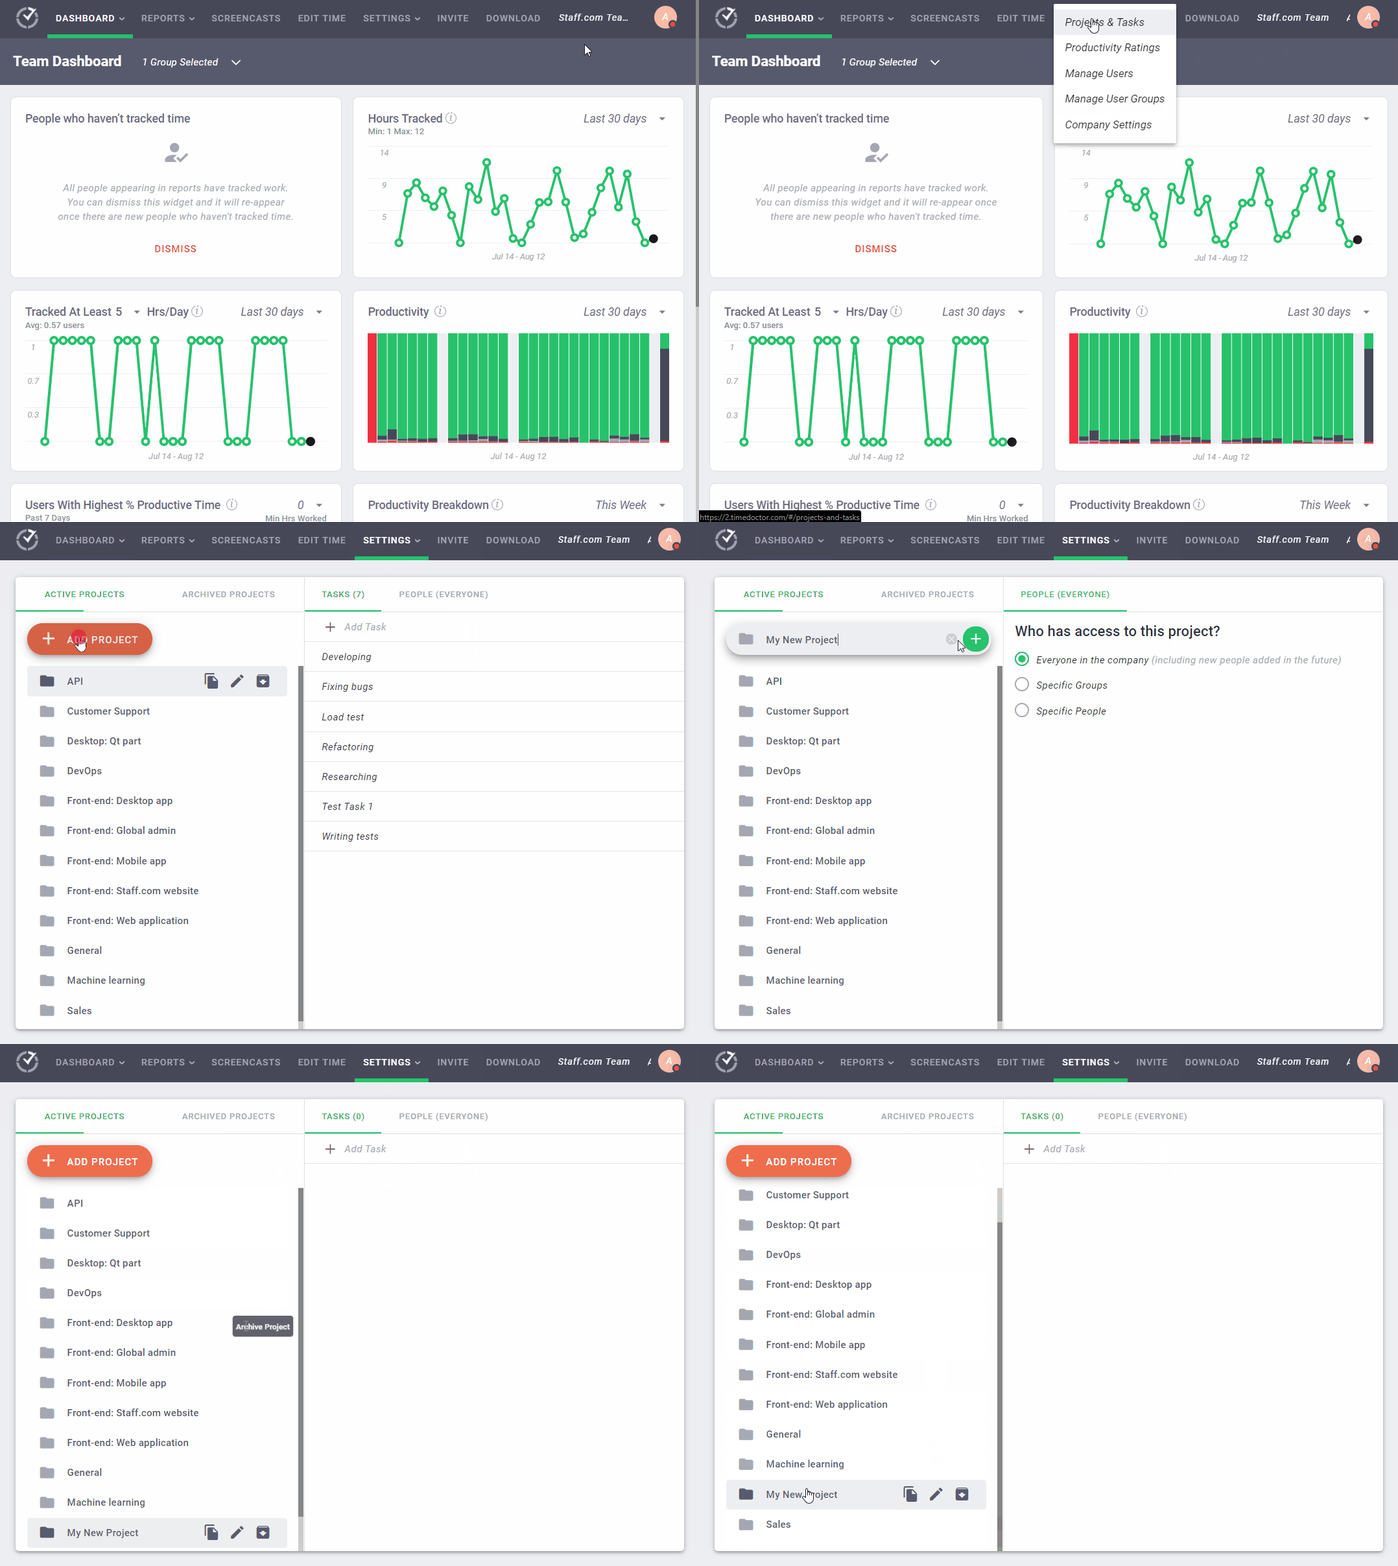
- Go to Settings / Projects & Tasks.
- Note: if this page is not available for your company, you need to enable the Projects & Tasks feature in Settings / Company settings. The setting for it is called Use projects & tasks.
- Click on Add Project
- Name your project and click on the button to add the new project to your project list.

How to Add Tasks and Users to a Project
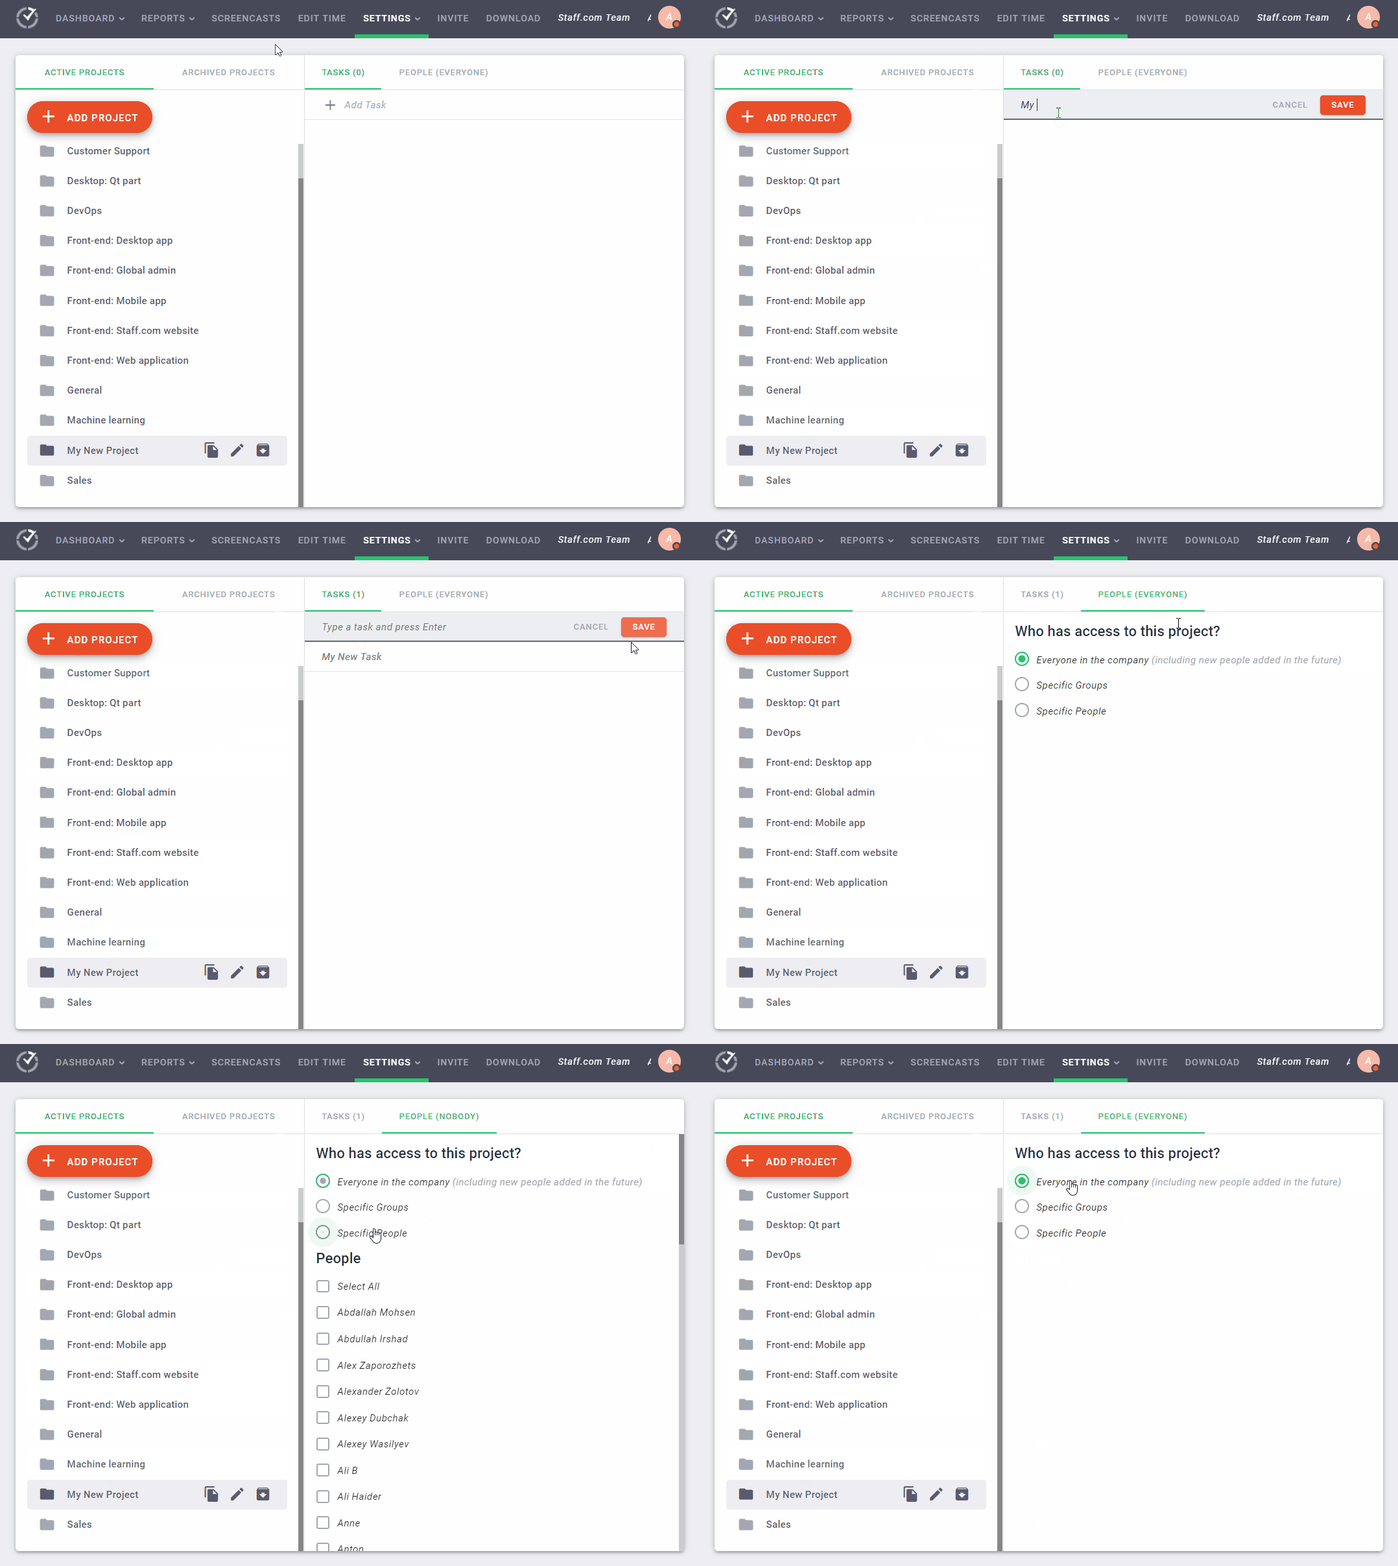
- In the Tasks tab of your selected project, click on Add task and name your new task.
- On the People tab of your selected project, select who should have access to that project and the tasks within it. You can choose to assign the project to all employees, some employees, or specific groups of employees.

That’s it! Now your employees should be able to see the newly-created project(s) and task(s) in their desktop app. Note: a project should contain at least one task to appear in desktop apps.
How to Remove a Project
Click on the Archive button next to the project’s name on the list of projects.
Who Can Create Projects and Tasks?
By default, only owners and admins can add projects and tasks.
You (admin access needed) can, however, allow managers to do it. To do so, you’ll need to go to Settings / Company Settings. Once there, enable the Allow managers to create projects and tasks setting. 
You can also allow regular users to create their own tasks. Here is an article for more details on this.
Reach out to support@timedoctor.com should you have any questions.
